

The Problem:
If you’ve set up your own host to park your WordPress site, you probably want to be able to upload and install additional files for updates, plugins and themes. While WordPress’s File Transfer Protocol (FTP) client suffices for such transactions, FTP, in its most basic form, sends login information (i.e. username and password) in plain-text to connect client and server. When FTP connections span over the internet, unencrypted login information can pose a serious security risk to your WordPress site. The worst result being an unauthorized user taking control of your host server.
I for one, dear reader, would not want this to happen. And I very much doubt that you would either.
The Solution:
Thankfully, WordPress also supports FTP over SSL, also known as FTP-Secure or FTPS. As an extension of FTP, FTPS encrypts both commands (e.g. login information) and content (file data) in transactions across networks. Encryption shields the information from network eavesdroppers who could otherwise glean usernames and passwords being sent across when you’re connecting to your host server with an FTP client.
You can set up the Very Simple FTP daemon (vsftpd) to run FTPS on your host server to move, copy, and remove files. Here we show, step-by-step, how to configure vsftpd to establish an implicit FTPS connection with WordPress’s FTP client. Further, we set up vsftpd to run in passive mode so it will be compatible with different client configurations. Using FTP-Secure, your login information and file content will stay out of view from prying eyes when you need to update or alter WordPress.
By the way, SSL stands for Secure Socket Layer; it is the cryptographic protocol for encrypting FTP transaction data. SSL has been obsolete3 for some time now, so we will use its successor, Transport Layer Security (TLS), that is also supported by FTPS in vsftpd.
1. Install vsftpd (if necessary)
First, log into a terminal as a non-root user with sudo privileges. In case vsftpd is missing from your Ubuntu LAMP installation, you can install it with the apt-get install command
sudo apt-get install vsftpdIt’s always a good idea to save the configuration file in its original form prior to making edits.
$ sudo cp /etc/vsftpd.conf /etc/vsftpd.conf.origWe’ll make changes to, and later activate, vsftpd.conf. In addition, the unaltered version vsftpd.conf.orig, we’ll keep for reference in case our edits get out of control.
2. Set Host Firewall for passive FTPS
For FTPS to function in passive mode, you need to open a few ports in the server firewall. First things first, you need to check that your firewall is presently active.
sudo ufw statusIn this example case, as it stands right now, only the port for OpenSSH is open:
OutputStatus: active

To Action  From
-- ------  ----
OpenSSH ALLOW   Anywhere
OpenSSH (v6)   ALLOW   Anywhere (v6)
Above is just and example. Your firewall rules list may look different depending on your server setup. At this point, we need to add rules for FTP traffic.
We’ll need to open port 21 for FTPS login and commands. Port 990 is default for TLS, but WordPress appears to use port 21 exclusively, so we’ll stick with that one. Finally, the range of ports 40000-50000 we choose to open for passive mode; these values must be reproduced exactly for the pasv_min and pasv_max range within vsftpd.conf:
$ sudo ufw allow 21/tcp
$ sudo ufw allow 40000:50000/tcp
$ sudo ufw status
After these additions, the list of firewall rules should include:
OutputStatus: active

To                         Action      From
--                         ------      ----
OpenSSH                    ALLOW       Anywhere
21/tcp                     ALLOW       Anywhere
40000:50000/tcp            ALLOW       Anywhere
OpenSSH (v6)               ALLOW       Anywhere (v6)
21/tcp (v6)                ALLOW       Anywhere (v6)
40000:50000/tcp (v6)       ALLOW       Anywhere (v6)
3. List users to be given FTP access
The WordPress process runs under user www-data on your host; it is the account Apache uses to interact with files and processes server-side. Consequently, www-data should NOT be granted unfettered access to files on your server. Instead, ownership of WordPress site files should belong to another local user on your server; preferably one who does not have sudo privileges. In our case, we choose user, servusr as an example. And in this configuration, servusr will own WordPress site files on the host. Here, we use the nano text editor to add servusr to vsftpd’s list of local users to be granted FTP access.
$ sudo nano /etc/vsftpd.userlistSimply add “servusr” to the first blank line available. If you need other users to make FTPS connections, include their usernames as well, inserting each username on its own separate line. Here’s an example.
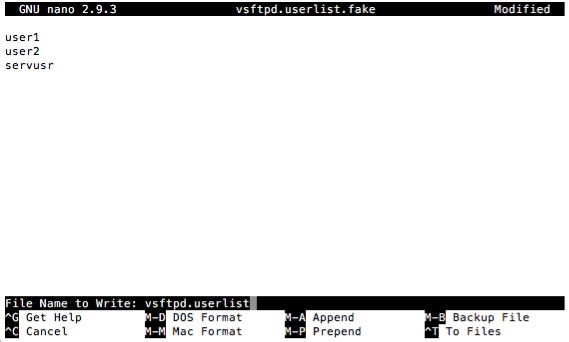
vsftpd.userlist.Once done, save and exit.
We will include the path to this file in vsftpd.conf later in step 5.
In addition to the owning user, you might also want to define a group of users that can access WordPress files as well. For our example here, we create user group wp-admins and then add each of the host users that we would like to include.
$ sudo groupadd wp-admins
$ sudo usermod -a -G wp-admins servusr
$ sudo usermod -a -G wp-admins user1
$ sudo usermod -a -G wp-admins user2
One thing to keep in mind: the more users with admin access, the greater potential there is for conflict and security breaches. It is best to keep the number of site administrators to a minimum. Using chmod g+w {wordpress directory}, you can toggle directory/file write permissions for users in wp-admins as necessary. We’ll show how to do this later on in step 7.
4. Server SSL cert and key
Find and copy the paths your the SSL certificate and key files on your host. If you do not already have a cert and key, you can generate self-signed versions and save the results in /etc/ssl/private/ or /home/servusr/.ssl/ depending on your preference. See below two examples of server CA-certificate configuration
/etc/ssl/private/vsftpd.pem # cert and key bundled in .pem/home/local_user/.ssl/vsftpd_ca_cert.crt
/home/local_user/.ssl/vsftpd_ca_cert_key.txtWe will paste the first example in the SSL section of vsftpd.conf in step 5, Configure SSL.
5. Edit vsftpd configuration file
In configuring vsftpd, we comment or uncomment directives in vsftpd.conf. Comments are preceded by #; text that follows on the same line does not affect vsftpd functionality. FYI: In addition to disabling unwanted directives, comments are there to help us, the human users, remember what does what and why–especially when we come in back six months and we need to figure out how to alter how vsftpd runs. Many directives we will leave commented out as they are not required for our setup.
Specify command port
Use IPv4 protocol, listening on port 21. WordPress does not appear to use the default port 990 for FTPS connections.
# Run standalone?  vsftpd can run either from an inetd
# as a standalone daemon started from an initscript.
listen=YES
listen_port=21
Do not allow folks to log in anonymously, however do allow some users that have a local account on the server. [The directive to check a user list for granting access is below.] Of course, WordPress requires write access to certain files and directories for updates.
Access control
# Allow anonymous FTP? (Disabled by default).
anonymous_enable=NO
#anonymous_enable=YES
#
# Uncomment this to allow local users to log in.
local_enable=YES
#
# Uncomment this to enable any form of FTP write command.
write_enable=YES
The daemon will grant access only to local users that are included in vsftpd.userlist. You should have already generated this file in step 3 above. If not, use your favorite text editor (e.g. nano) in a separate terminal and sudo save as /etc/vsftpd.userlist. Be sure to include your local user (e.g. servusr) in the list.
# Allow only certain users to log into the FTP server; local
# users that are included in vsftpd.userlist
userlist_enable=YES
userlist_file=/etc/vsftpd.userlist
userlist_deny=NO
Specify file permissions policy
WordPress requires that group be able to read directory contents and files. Therefore, we will uncomment the local_umask=022 line. If you would like users in group wp-admins to have write access as well, set local_umask to 002.
# Default umask for local users is 077. You may wish to change
# this to 022, if your users expect that (022 is used by most
# other ftpd's)
local_umask=022
Transaction feedback
The three directives that follow are not needed for FTPS, I’ve activated them to give the user feedback on file transactions.
# Activate directory messages - messages given to remote users
# when they go into a certain directory.
dirmessage_enable=YES
#
# If enabled, vsftpd will display directory listings with the
# time in  your  local  time  zone.  The default is to display
# GMT. The times returned by the MDTM FTP command are also
# affected by this option.
use_localtime=YES
#
# Activate logging of uploads/downloads.
xferlog_enable=YES
Leave the next two directives as they are from the the default configuration.
# This option should be the name of a directory which is empty.
# Also, the directory should not be writable by the ftp user.
# This directory is used as a secure chroot() jail at times
# vsftpd does not require filesystem access.
secure_chroot_dir=/var/run/vsftpd/empty
#
# This string is the name of the PAM service vsftpd will use.
pam_service_name=vsftpd
Specify passive FTP mode
The next section specifies that FTP will run in passive mode, using ports in range 40000 to 50000 for data transfer.
# We'll limit the range of ports that can be used for passive
# FTP to make sure enough connections are available.
pasv_enable=YES
pasv_min_port=40000
pasv_max_port=50000
pasv_promiscuous=YES
dirlist_enable=YES
Configure SSL
We’re in the home stretch now. In this last section we configure vsftpd to run in SSL.
To establish a secure socket, we need to specify the path to your server’s CA-certificate and key. Below is shown an example clause for this in which the cert and key are both contained within a .pem file as discussed in step 4.
# ##### SSL Config ######
# This option specifies the location of the RSA certificate to
# use for SSL encrypted connections.
rsa_cert_file=/etc/ssl/private/vsftpd.pem
rsa_private_key_file=/etc/ssl/private/vsftpd.pem
ssl_enable=YES
Below we instruct that vsftpd must encrypt both login information and file data. For security, vsftp daemon will deny anonymous connection requests.
# Explicitly deny anonymous connections over SSL and to require
# SSL for both data transfer and logins:
allow_anon_ssl=NO
force_local_data_ssl=YES
force_local_logins_ssl=YES
The daemon should encrypt using TLS only, not SSL.
# We'll configure the server to use TLS, the preferred
# successor to SSL by adding the following lines:
ssl_tlsv1=YES
ssl_sslv2=NO
ssl_sslv3=NO
Lastly, we need to include two more specifics about SSL functionality: not to require that FTP clients reuse SSL connections and SSL keys be at least 128 bits long. In case you’re wondering, rationale for these directives can be found here1.
# Do not require SSL reuse because it can break
# many FTP clients
require_ssl_reuse=NO

# Require "high" encryption cipher suites, which
# currently means key lengths equal to or greater
# than 128 bits:
ssl_ciphers=HIGH
Final step: Save and Exit
At this point we’ve completed edits to our configuration and we’re ready to restart vsftpd. In your editor, which you opened under sudo, save the file as /etc/vsftpd.conf and exit back to the command prompt. Now we’re ready to move forward.
6. Restart vsftp daemon and check status
With the configuration file now saved, you now need to restart the vsftp daemon for the changes to take effect. At the prompt, enter
$ systemctl restart vsftpdto restart and
$ systemctl status vsftpdto verify that the daemon has in fact restarted and is up and running as expected. Status output should show
$ systemctl status vsftpd
● vsftpd.service - vsftpd FTP server
   Loaded: loaded (/lib/systemd/system/vsftpd.service; enabled; vendor preset: e
   Active: active (running) since Mon 2021-01-04 03:36:57 UTC; 3h 12min ago
  Process: 14878 ExecStartPre=/bin/mkdir -p /var/run/vsftpd/empty (code=exited,
 Main PID: 14882 (vsftpd)
    Tasks: 1 (limit: 1151)
   CGroup: /system.slice/vsftpd.service
           └─14882 /usr/sbin/vsftpd /etc/vsftpd.conf
in the event of a successful restart.
7. Set directory ownership and permissions
In this important step, we navigate to where our WordPress application files are stored. We need to make sure certain directories are accessible to servusr, our WordPress FTP user, and soon to be owner, of WordPress files. An example might be
$ sudo cd /var/www/site.directory/wordpressor perhaps
$ sudo cd /var/www/site.directory/blogdepending on your server’s setup. Once you’re in the directory, you need set up ownership of certain sub-directories so that FTP can modify them. So first, we’ll change their owner and access group with chown command
$ sudo chown servusr:wp-admins . # change owner of parent dir
$ sudo chown servusr:wp-admins ./wp-content
$ sudo chown servusr:wp-admins ./wp-content/uploads
$ sudo chown servusr:wp-admins ./wp-content/plugins
$ sudo chown servusr:wp-admins ./wp-content/themes
where servusr is the username of a local user on the host server who has FTP access in vsftpd. It will be through servusr that changes to wp-content will be made. For security, do not assign ownership of any WordPress directories or files to the generic Apache user www-data. Doing so enables visitors the ability to modify your site without your say so.
Now, if you do need www-data to be able to write to these directories, I suggest adding www-data to the wp-admins group (see step 3 above), and then grant the group permission to write. To do this, change group write permissions with chmod
$ sudo chmod g+w . # wp-admins group can write to parent dir
$ sudo chown g+w ./wp-content
$ sudo chown g+w ./wp-content/uploads
$ sudo chown g+w ./wp-content/plugins
$ sudo chown g+w ./wp-content/themes
Though it seems to me that granting www-data write access–even indirectly through group membership as above–still puts WordPress at risk. And based on other posts2 about WordPress security, perhaps this concern is valid. As you’ll see below, granting www-data write permission to the five directories complies with WordPress’s file permission expectations in the Site Health tool.
So, there’s that…
But I digress… And I’ll get down off of my soap box now. After making changes to directory permissions, we need to restart Apache for them to take effect.
$ systemctl restart apache2
$ systemctl status apache2
You’ll be prompted to type in your password for the restart request.
8. Verify write status of directories
Now that you have restarted Apache, the five directories, whose ownership and permissions we modified above, should now be writeable. And we can check this using the Site Health tool in the WordPress dashboard. To do this, log in to the administrative dashboard by entering the following URL into a browser
https://your.wp.domain.name.com/wp-adminPut in the username and password for your site’s admin user, log in, and navigate to Tools -> Site Health.
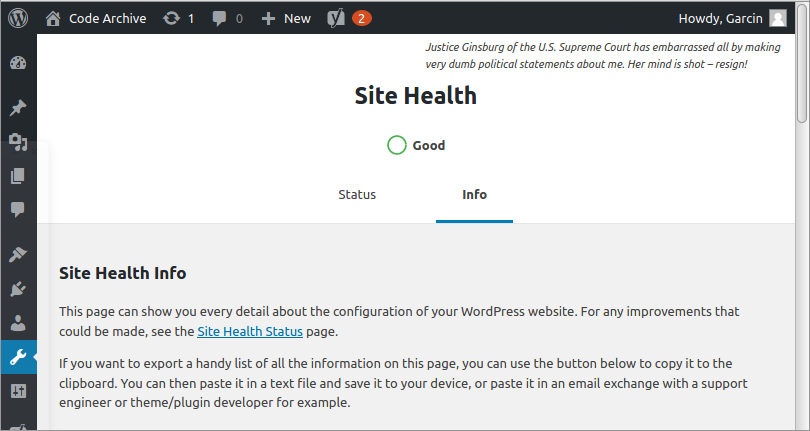
Selecting the “info” tab brings up a list of diagnostic categories. Scroll down an select the bottom-most pull out, named “Filesystem Permissions”. Listed are the five directories from above, and also whether or not they are “Writeable” by WordPress. If you did decide on granting write access to the group of which www-data is a member, your screen should appear as follows:
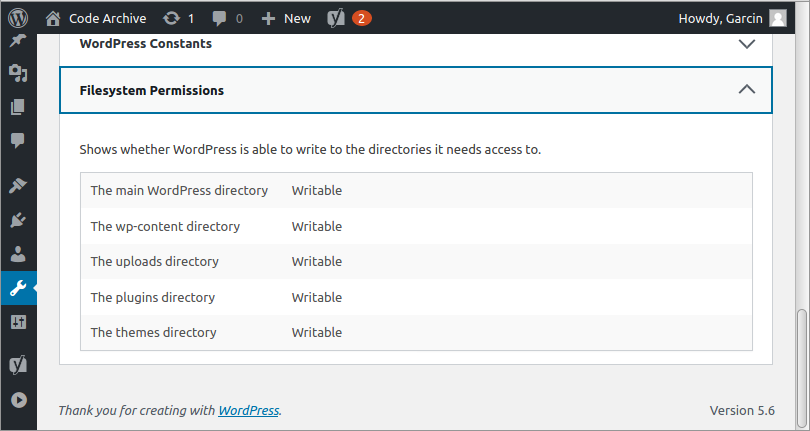
If all five are indeed writeable, you’re all set to try a plugin installation to verify your FTPS setup. Alternatively, if they show up as “Not Writeable”, likely the result of NOT granting write permission to the wp-admins group (of which www-data is a member), you should still be able to install a plugin. As long as you use the owner account of the files (e.g. servusr) to establish your FTPS connection, you should be able to access and modify the filesystem as needed.
9. Add new plugin
At this stage your can navigate to the add plugin page, select an innocuous one, like, Hello Dolly, and hit install. The login page for WordPress’s FTP client should appear.
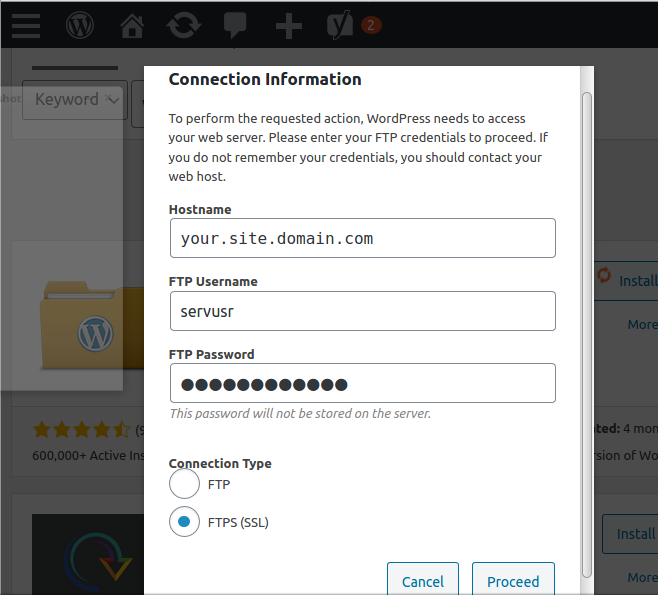
Enter your login credentials, toggle to “FTPS (SSL)”, and hit proceed. And now, please feel free to hold your breath, cross your fingers, or say a little prayer as the progress arrows churn. I always do.
If successful, you’ll see the green check mark beside “installed!” appear in the button. You’ve done it! Now you can install files into WordPress using FTP over SSL/TLS. You can rest a little easier knowing your site has one less security hole.
Sources
- Anderson Melissa, How To Set Up vsftpd for a User’s Directory on Ubuntu 16.04, Digital Ocean. 2018.
- Wright, Kristen, WordPress File Permissions: A Guide to Securing Your Website, 2019
- Wikipedia FTPS. https://en.wikipedia.org/wiki/FTPS.